How To Digitize your Magic Videos
DVDs have come and gone the way of the LaserDisc, the VHS, the BetaMax, and the Film Reel. With each transition of storage technology we lose a bit of the magical wisdom stored within. I'm going to show you how to capture your magic video collection into digital video files, which ought to last longer than their physical form.
Copyright Warning
Copyright law gives an individual the right to make back-up copies of works they have purchased, so long as the copy stays with the original. You absolutely cannot keep a copy when you sell or give-away the original. You cannot sell, trade, or give-away your digital copy. In sharing this information I am trusting you to respect the rights of magic creators and publishers.
Your DVDs are slowly dying
DVDs and CDs are not permanent objects. They break down over time and the data contained within can become unreadable. This is especially true for the writeable DVD-R and CD-R discs, which are fairly common for "home made" magic lectures and products which were produced in low quantity. In fact, I'm willing to bet there's a disc on your shelf right now which has already turned sour and you don't even know it!
The best time to digitize your disc was they day you got it. The second best time is now.
So let's get started and go through the process of capturing the data from those discs and saving them onto a computer hard drive or other longer term storage.
Reading Discs
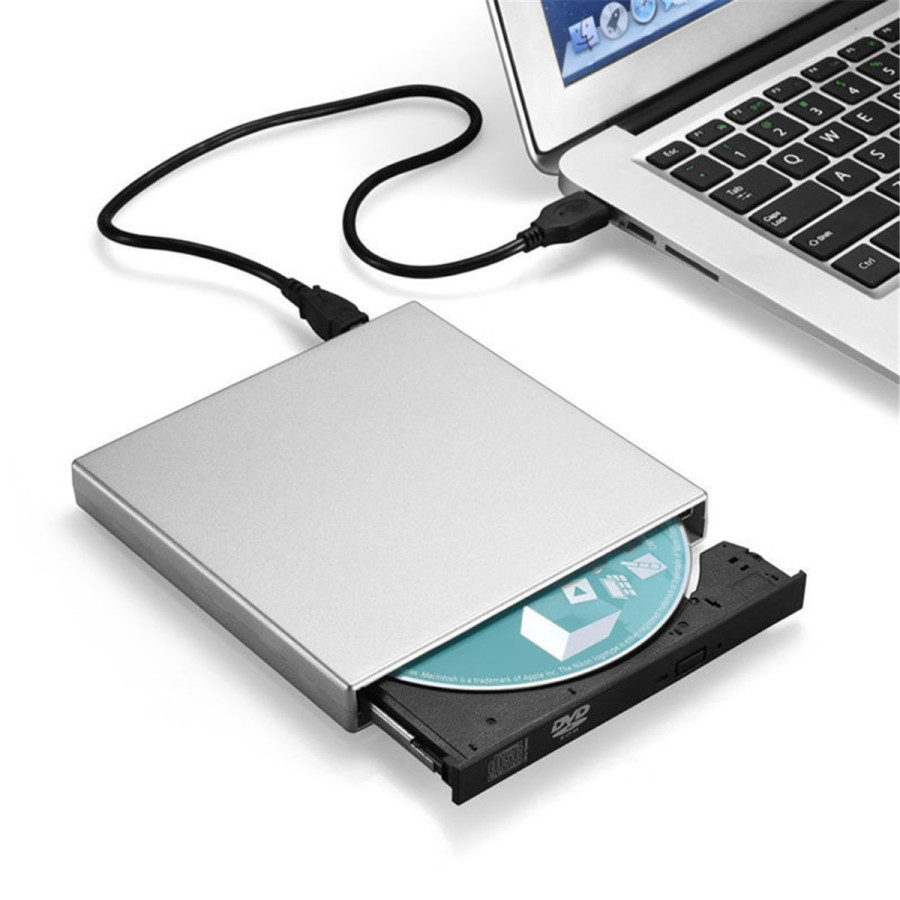
For this process you will need to read discs on a computer, which means you need an "Optical Drive" (a.k.a. DVD-ROM drive) attached. Newer computers and especially laptops have abandoned this aging technology, but there is a remedy. You can purchase an external DVD drive which plugs into your computer or laptop with a USB cable. They will run you about $15 to $30. Buyer beware; the first (cheap) one I got didn't seem to work very well and really struggled to read discs.
Cleaning Discs and Fixing Scratches
Before you pop the disc in, check to make sure it looks clean. Remove any fingerprints, dust, or smudges. You can use a soft cloth, the kinds used for cleaning eyeglasses, and wipe from the center of the disc out towards the edge.
If a disc is badly scratched and won't work, you can try buffing the scratches out of the plastic. Use a light scouring substance, such as toothpaste, and try to smooth out the scratched area. This is not guaranteed to rescue a damaged disc.
Data Discs and Video Discs
Data discs are easy to work with, They were always meant to be opened on a computer, where you can access the individual files stored within. They may contain a mix of video files, PDF files, or other images and text.
All you need to do is load the disc into your computer, select all the files, and drag them over to your hard drive. The computer will copy them over.
Cross your fingers that no files have been corrupted. If there is an error when copying all the files, try transferring individual files one at a time. There may only be certain parts of the disc that were damaged, and some files may be readable.
Earlier this week I picked up SYZYGY, Lee Earle's mentalism magazine, on a CD-R disc at an estate sale and it took several attempts for the disc to be succesfully opened. These old discs can be finicky!
Video discs are intended to be played in a DVD player attached to your TV, and opening them on your computer will not reveal the files within. You won't be able to simply save or copy the content. Rather, you will need to re-encode the DVD video into a digital video file. It's a bit of a process the first time, but once you get the hang of it saving all your DVDs will be a snap!
There are some rare discs which are both video and data discs. They will play the video on a DVD player, but then have "bonus files" such as printable PDFs available via a computer. For such a disc you'll need to grab the files and encode the video.
How to Save DVDs to Video Files
Let's get to the meat of this article. We're going to take a DVD and extract the video content into an MP4 video file, which can be saved and played on your computer.
The secret ingredient is a bit of free software called Handbrake. To get started we will need to...
Download and Install Handbrake Software
Go direct to the Handbrake website and download the right version for you. It works on Windows, as well as Mac and Linux. It's free and open source. It's been around for over a decade and has my full trust as safe to install.
Once you downloaded and installed the software, you can follow along with me as I digitize some DVDs.
In the above video you can watch me encode a DVD step-by-step.
- Select Source and pick the DVD loaded into your drive.
- Browse to select a folder location to save the files.
- Select a preset for encoding settings. For instructional videos I tend to use the Gmail 480p setting, which creates a low quality, smaller video file.
- Add All To Queue then Start the Queue
It will take a couple hours to work through an entire DVD. In then end you'll have one or more video files that may require a bit of labelling and organization.
Alternative DVD Conversion Software
I received a hot tip from Gordon Drayson (host of the FACE podcast for Children's Entertainers) about another software tool called MakeMKV which will sometimes do a better job for extracting video files from a DVD. I was having some trouble with a Patrick Page video on Thumb Tips, and MakeMKV saved the day.
It generates BIG files, though, at full resolution. It output a 2 GB file for a 47 minute video, then I was able to run that file through Handbrake to shrink it down to 202 MB.
How To Digitize VHS Tapes
There are plenty of great magic VHS cassettes which will never be released on DVD, and if you're willing to deal with them you can pick up a treasure trove of magic for basically free. Magicians are literally giving them away!
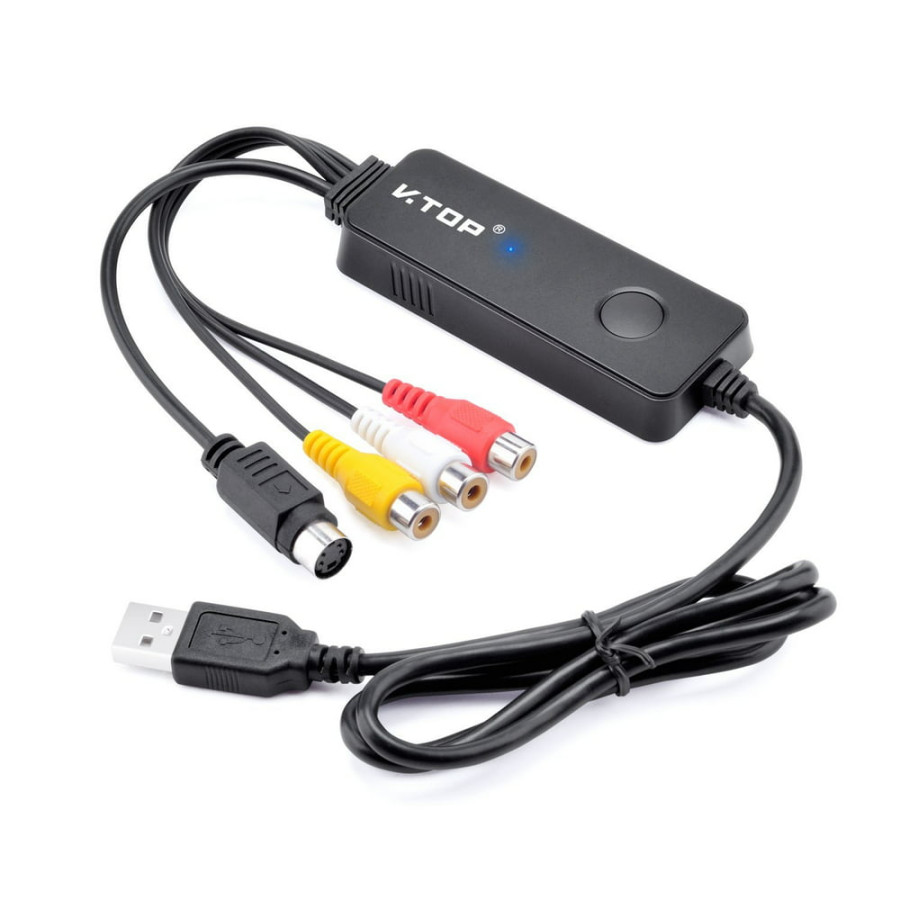
In order to get your VHS video onto your computer you need two things: a VHS player (hunt through your uncle's basement, or the local thrift store) and a RCA video capture device (available online for about $25)
What this device allows you to do is plug in your VHS player into your computer, instead of an old TV. Pop in the tape and press play. The computer can then digitally record the signal coming in, and save it as a video file. When you purchase the capture device it will come with recording software you can use.
Note: You can also use this device with a DVD player to capture/record a DVD disc if, for whatever reason, the Handbrake method isn't working for you.
Where to Store and Back-Up Your Library
These are files you want to keep forever, and considering many of these videos will have been purchased at $40 a pop, you'll want to make an effort to protect your investment. One failed hard drive and you can say goodbye to all thoe Easy To Master Card Miracles!
In my collection the average video file is about 750 MB in size, and I've collected up about 250 GB (as in Giga) worth of videos. It can very quickly bog down your computer if you don't have a storage solution.
I want to make sure the videos are available on my computer to be easily played, but also backed up in "the cloud." (ie: an off-site location)
Personally I use Microsoft OneDrive, as part of thier Office 365 subscription ($8 to $15 per month), which grants me 1 TB (as in Tera, or 1000 Gigas) of cloud synced storage. That means I can save a file on my own computer and it automatically gets uploaded and backed-up. I use it for my day-to-day business files, and had enough extra space to that I could add in my magic library without it being a burden.
If you have no interest in the Office 365 software and tools, then I wouldn't suggest OneDrive as the solution just for your magic library storage. You could get suitable cloud storage for about $4 each month. Although, the simple solution may be best.
Buy yourself a pair of external hard drives, or even USB thumb drives, of appropriate size (a one time investment of $150 or so) and load all your digital library on there. Keep the second drive at a friend or relative's house. Make sure to keep the back-up drive updated with any new additions. It's a low-tech solution and you're covered if (when) your primary drive fails.
(Side note: if you keep one at a friends house, make it a non-magician friend so they're not tempted to watch anything and violate copyright law)
Final thoughts
There you have it, a complete guide to becoming a digital magic hoarder. You can collect all the gigabytes worth of tricks you want without the shelf space and dust. When I first did this process my goal was to lighten my load so, once the DVD was digitized, I would destroy the original disc and toss it. Just double check that the transfer worked before you scrap the original. (I, sadly, lost a couple things in my haste)
Having the digital video files accesible a click away has resulted in my being more likely to watch my videos. Without the fuss of getting a DVD, putting it in the player, clicking through menus and what-not. I can also search, by name, through my labelled files in a split second.
If you want to get especially nerdy, you can even set-up your own private Netflix-style media server to have your entire magic collection available on your smart TV. (that level of techno-geekiness is beyond the scope of this blog... see Jellyfin for more info)
I do have some regrets about the time I aggresively digitzed books, which have more value in their physical form, but I love my digital collection of videos. If I get a new DVD it's turned digital right away and tossed in the bin before it ever goes on a shelf.